After I published Dockerized build environments for C/C++ projects, I was approached on a few occasions, both online and offline, with questions regarding my IDE/text editor setup.
While IDEs and text editors provide different features, the most important, from my point of view, are syntax highlighting, auto-completion, and code navigation. Since a single software usually provides all three, I will call it just auto-completion. I prefer to do things like building and debugging directly from the terminal; I will discuss performing these functions via VS Code later in the post.
Auto-completion types
Auto-completion is probably one of the most important things a modern IDE or text editor may provide. There are several types of autocompletion mechanisms: some are more accurate but robust, while others are more precise but require more fine-tuning.
-
Index/parser based is quite simple: there is an application that parses the code and indexes it; later, when auto-completion is triggered, the application looks up a symbol in the index database. Probably, the most famous implementation is ctags and its descendants. The major problem with such tools is that it is tough to write a good parser for C++, which often makes the index database and cross-referencing between files in a project inaccurate. Index-based tools are agnostic to dockerized builds.
-
Tree-sitter is a lightweight parser that builds an abstract syntax tree (AST) for each source file. The tree is used to collect data about text objects in source files; it is stored in a database or a memory and used to provide information for auto-completion. Unfortunately, its autocompletion capabilities are quite limited at the moment, mostly because it has no information about the build system and parses every file individually. However, it is widely used as a data provider for extended syntax highlighting. This mechanism is also insensitive to dockerized builds.
-
Compiler-based is more complicated: it utilizes the compiler’s original parser to build an abstract syntax tree (AST), which is used for indexing. As a result, the autocompletion metadata is collected by the best language parser in the world, the compiler. Usually, this kind of tool provides the most accurate information about the source for auto-completion. Also, it is often the heaviest option. Almost always affected by the dockerized builds.
-
Hybrid is a mixture of the above.
Since the accuracy of autocompletion is extremely important to me, I always prefer using compiler-based tools.
Clangd
The most prominent example of a compiler-based autocompletion parser for C++ is clangd; it is based on the Clang C++ compiler and part of the LLVM project. Once the clangd server is launched, it looks for a file compile_commands.json, which contains a list of files in the project together with the compiler flags. To instruct CMake to generate this file, add the following to the top-level CMakeLists.txt file:
1
set(CMAKE_EXPORT_COMPILE_COMMANDS ON)
For information about other build systems and customized configurations, please refer to the official documentation.
Usually, I add a symlink to this file from the top-level folder in the source tree:
1
2
3
4
cd Project/
ln -s ./build/compile_commands.json compile_commands.json
ls -l compile_commands.json
lrwxrwxrwx 1 dima dima 36 Aug  2 17:13 compile_commands.json -> ./build/compile_commands.json
For the example from Dockerized build environments for C/C++ projects, the generated compile_commands.json looks like the following:
1
2
3
4
5
6
7
[
{
  "directory": "/example/build",
  "command": "/usr/bin/g++  -DBOOST_ALL_NO_LIB -I/example -isystem /usr/local/include    -Wall -Wbuiltin-macro-redefined -pedantic -Werror -std=c++1z -o CMakeFiles/a.out.dir/main.cpp.o -c /example/main.cpp",
  "file": "/example/main.cpp
}
]
The JSON contains three entries per each file:
- Path to the directory where
compile_commands.jsonfiles are located - Compile commands, including “defines”, “include” paths, C++ standard version, flags, etc.
- Path to the C++ file
Note that all the paths are absolute, meaning that clangd has to run on the same filesystem as the build system. This becomes a problem when building in docker: the clangd server runs on the host while the absolute path to source files and “includes” is found in the docker container’s filesystem. We will come back to this point later on.
After the file is loaded, the server parses each file, builds its AST, collects metadata about variables and functions usage, #defines and #if-defs related to this file and others, and stores it in the .cache folder. Note that this folder is created in the same directory where compile_commands.json is located.
The parsed data is stored per cpp file in a *.idx format:
1
2
-rw-r--r-- 1 dima dima 7.6K Sep 15 11:47 robot.cpp.5254FE304AF08338.idx
-rw-r--r-- 1 dima dima  26K Sep 18 09:13 spaceship.h.78C478E3644A6BF2.idx
Fortunately, clangd watches the files and updates the index in the background.
VS Code with Clangd
The first time I used Clangd was via an amazing Vim plugin YouCompleteMe. Later, I switched to Neovim and continued using clangd as an LSP server. A few months ago, I switched to VS Code with the VSCode Neovim plugin. I confess I am addicted to Vim shortcuts.
To enable clangd in VS Code, we first need to install the official LLVM extension. Once installed, you will be prompted to install the latest clangd server, which is strongly suggested. While the setup thus far would be enough for natively built projects, dockerized builds would require an extra step.
VS Code with Docker Support
VS Code provides Docker support via the Remote - Containers extension. A Docker container can be used as a full-featured development environment, where any folder can be opened inside (or mounted into) a container and Visual Studio Code’s complete suite of features are at the user’s disposal.
A file .devcontainer.json in the project’s top-level directory tells VS Code to re-load it in a Docker container. For our example project, it will look like the following:
1
2
3
4
5
6
7
8
9
10
11
12
13
14
15
16
17
18
{
 "image": "example/example_build:latest",
 "runArgs": [
  "--cap-add=SYS_PTRACE",
  "--security-opt",
  "seccomp=unconfined"
 ],
 "customizations": {
  "vscode": {
   "extensions": [
    "llvm-vs-code-extensions.vscode-clangd",
   ]
  }
 },
 "workspaceMount": "source=${localWorkspaceFolder},target=/example,type=bind",
 "workspaceFolder": "/example",
 "onCreateCommand": "apt update && apt install -y git && git config --global --add safe.directory /example"
}
where:
"image"- the image we use for building the project"runArgs"- represents the flags provided todocker runfor launching the container for auto-completion. In this example, I added the basic flags required for debugging in Docker."extensions"- a list of VS Code extensions to be installed in the container. I have added onlyclangd, but more will be added soon."workspaceMount"- mounting point; in our case, we mount the current directory to the directoryexamplein the container, the same way we did for the build container."onCreateCommand"is a bit ugly: the build container comes without Git, so I had to install it every time the auto-completion container is created. I believe there is a cleaner way to do it, but this works fine for now.
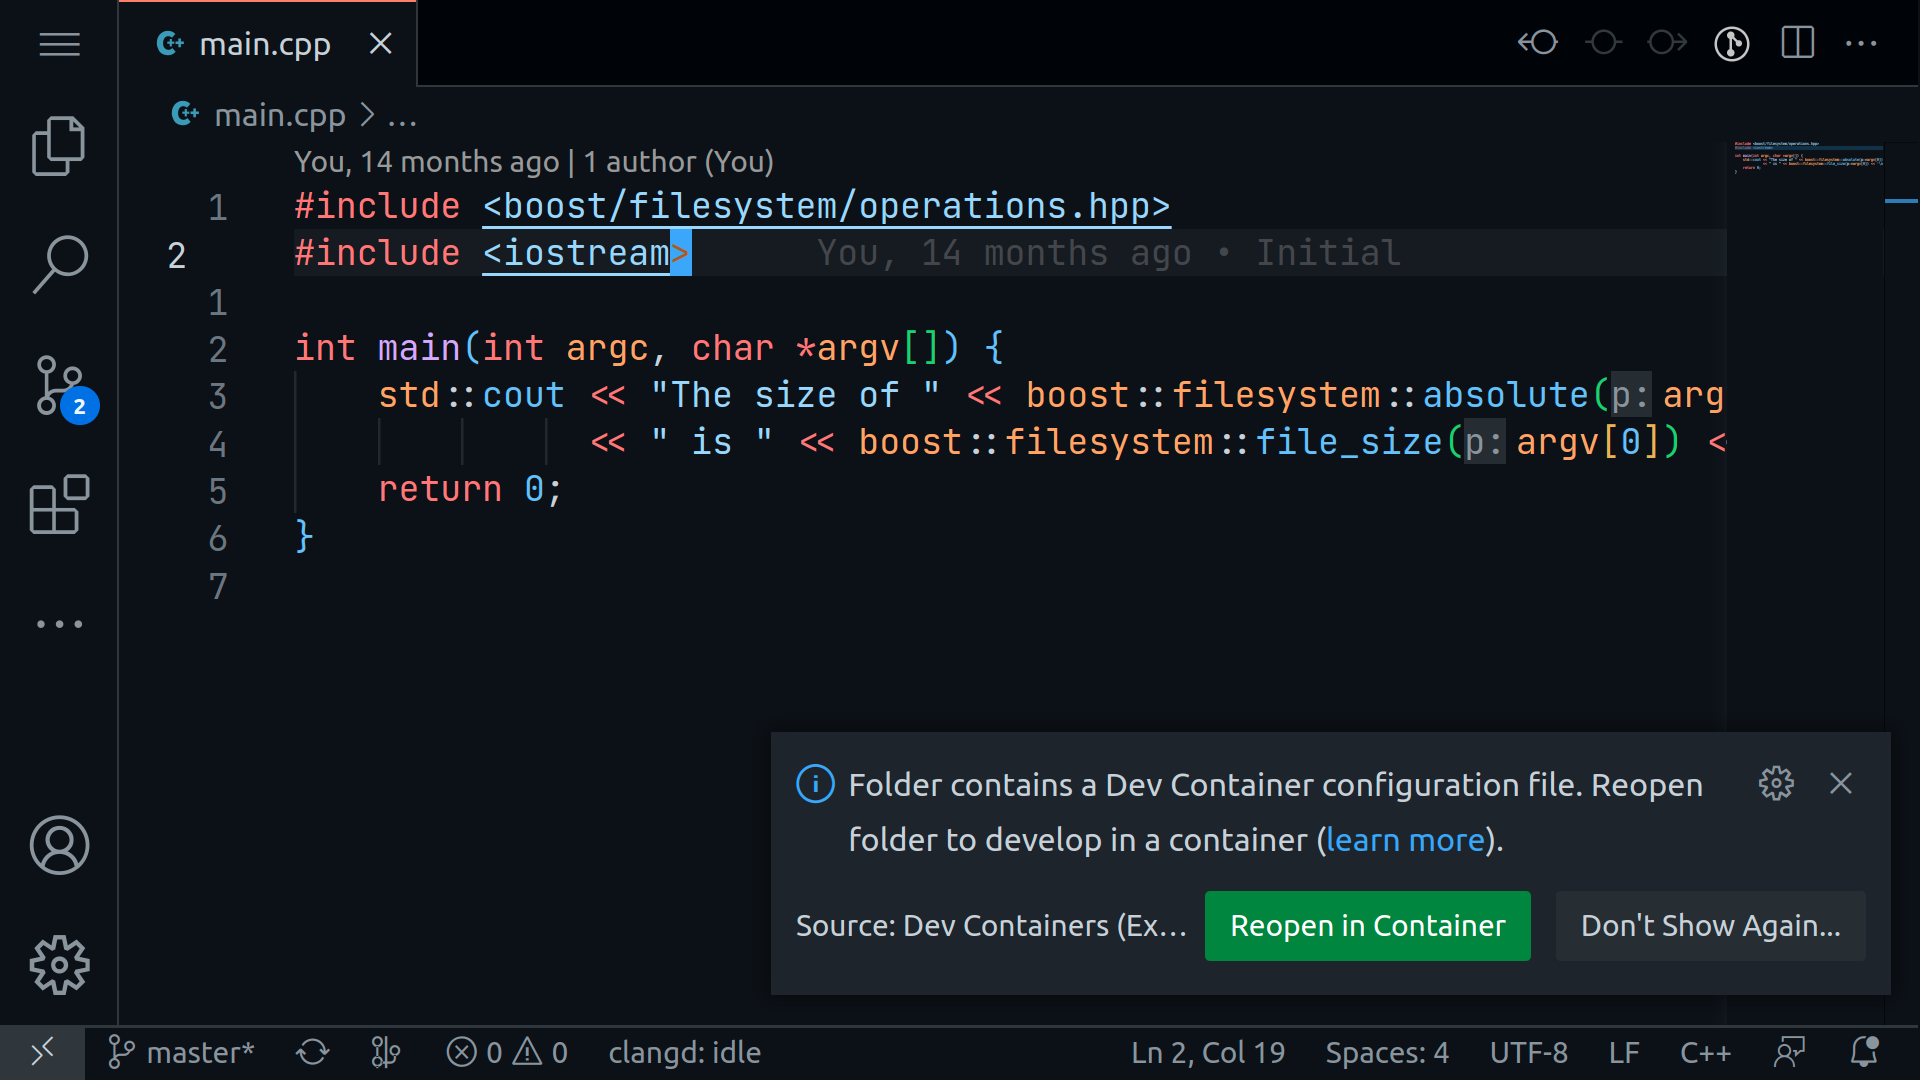
After the Docker extension is installed and the .devcontainer.json file is placed in the repository, VS Code proposes to re-open the project in the container:
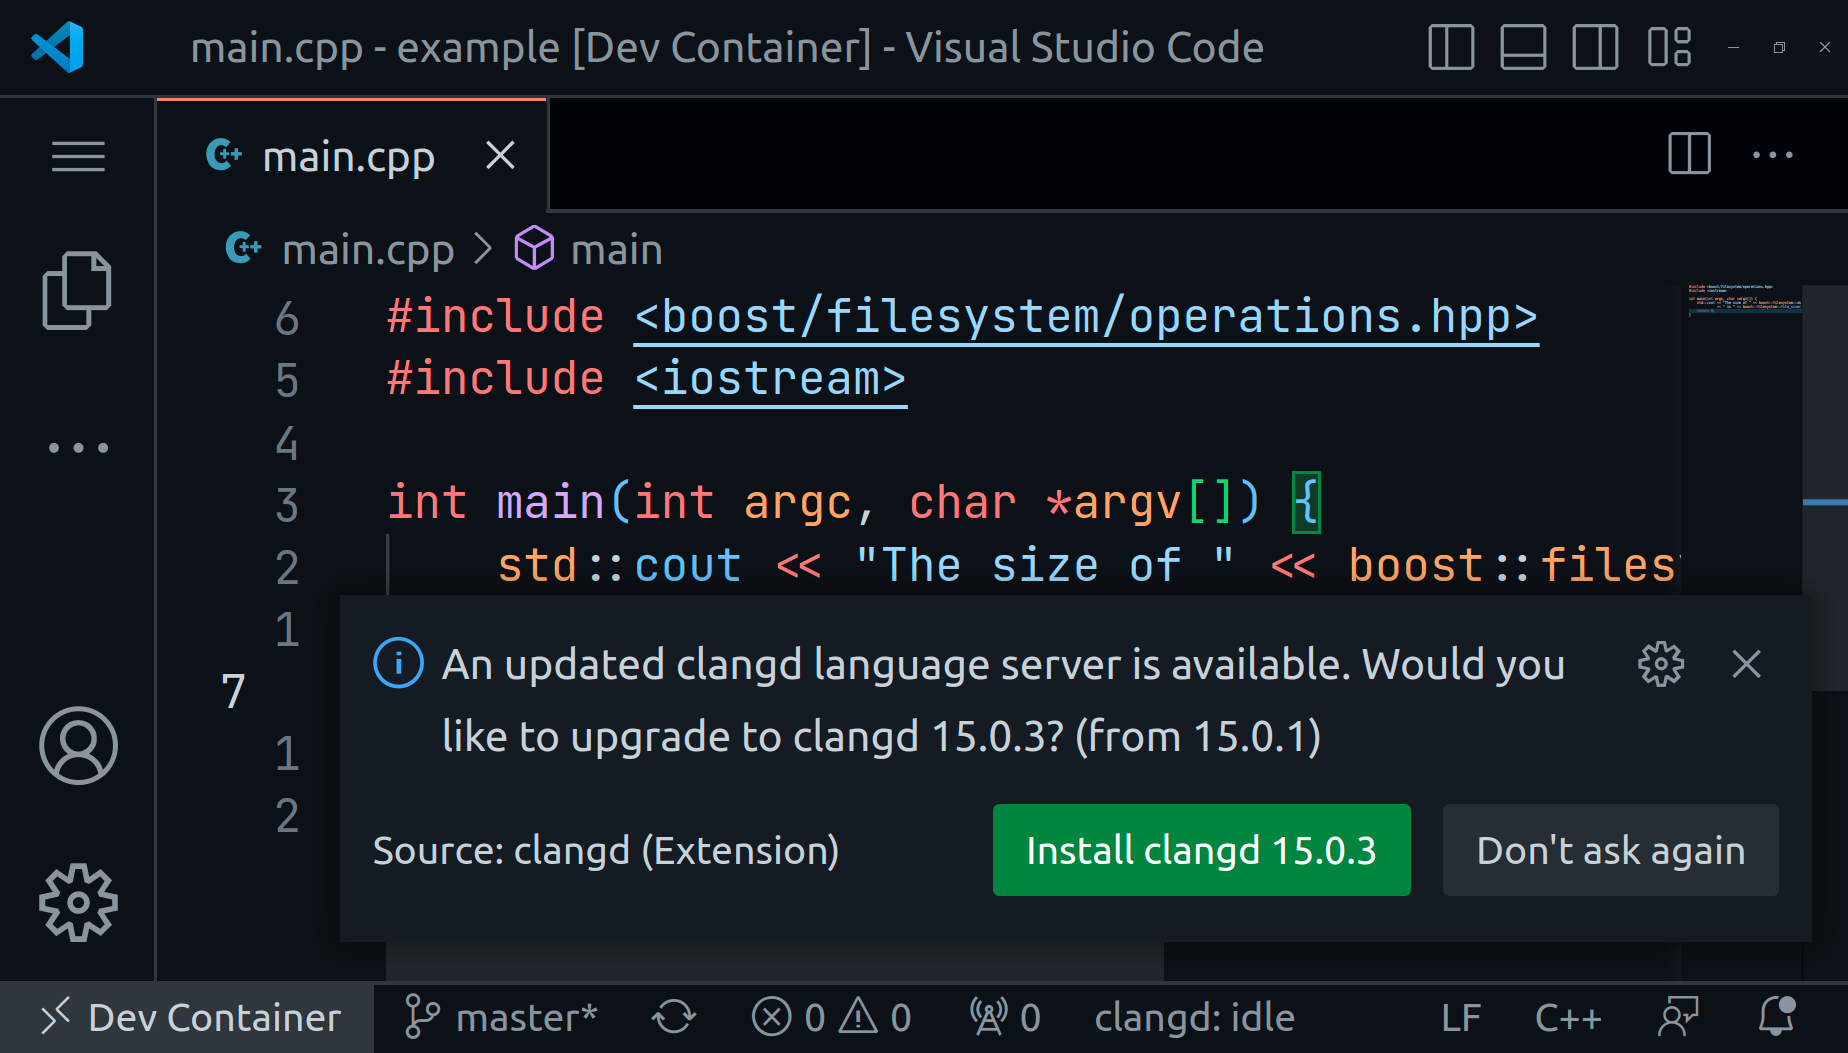
Once the user agrees, VS Code launches a Docker container based on the "image" and adds the extensions specified in "extensions". Since the base image does not contain clangd, VS Code will ask to install it; it is strongly recommended to proceed.
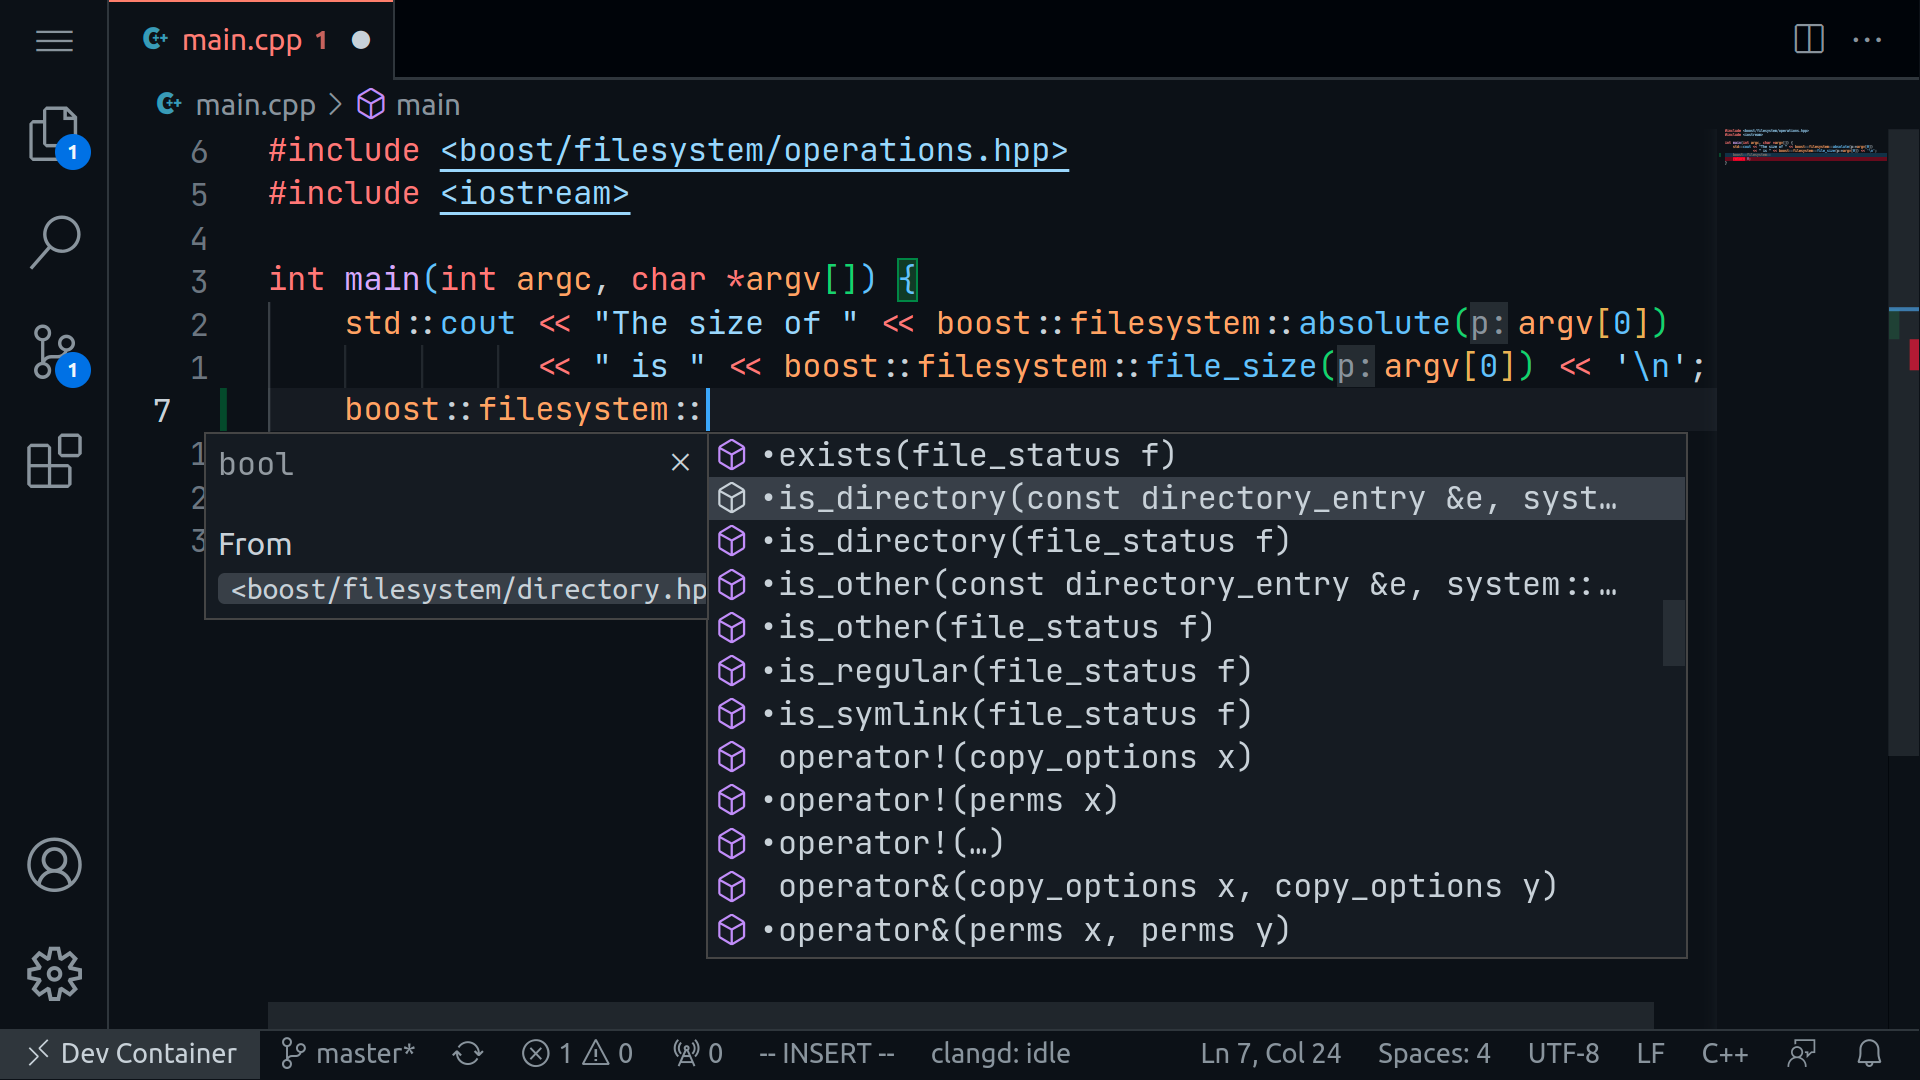
Once installed and reloaded, VS Code launches the clangd server, which can be confirmed by checking the source tree for the .cache directory with the index database, and the auto-completion works like a charm.
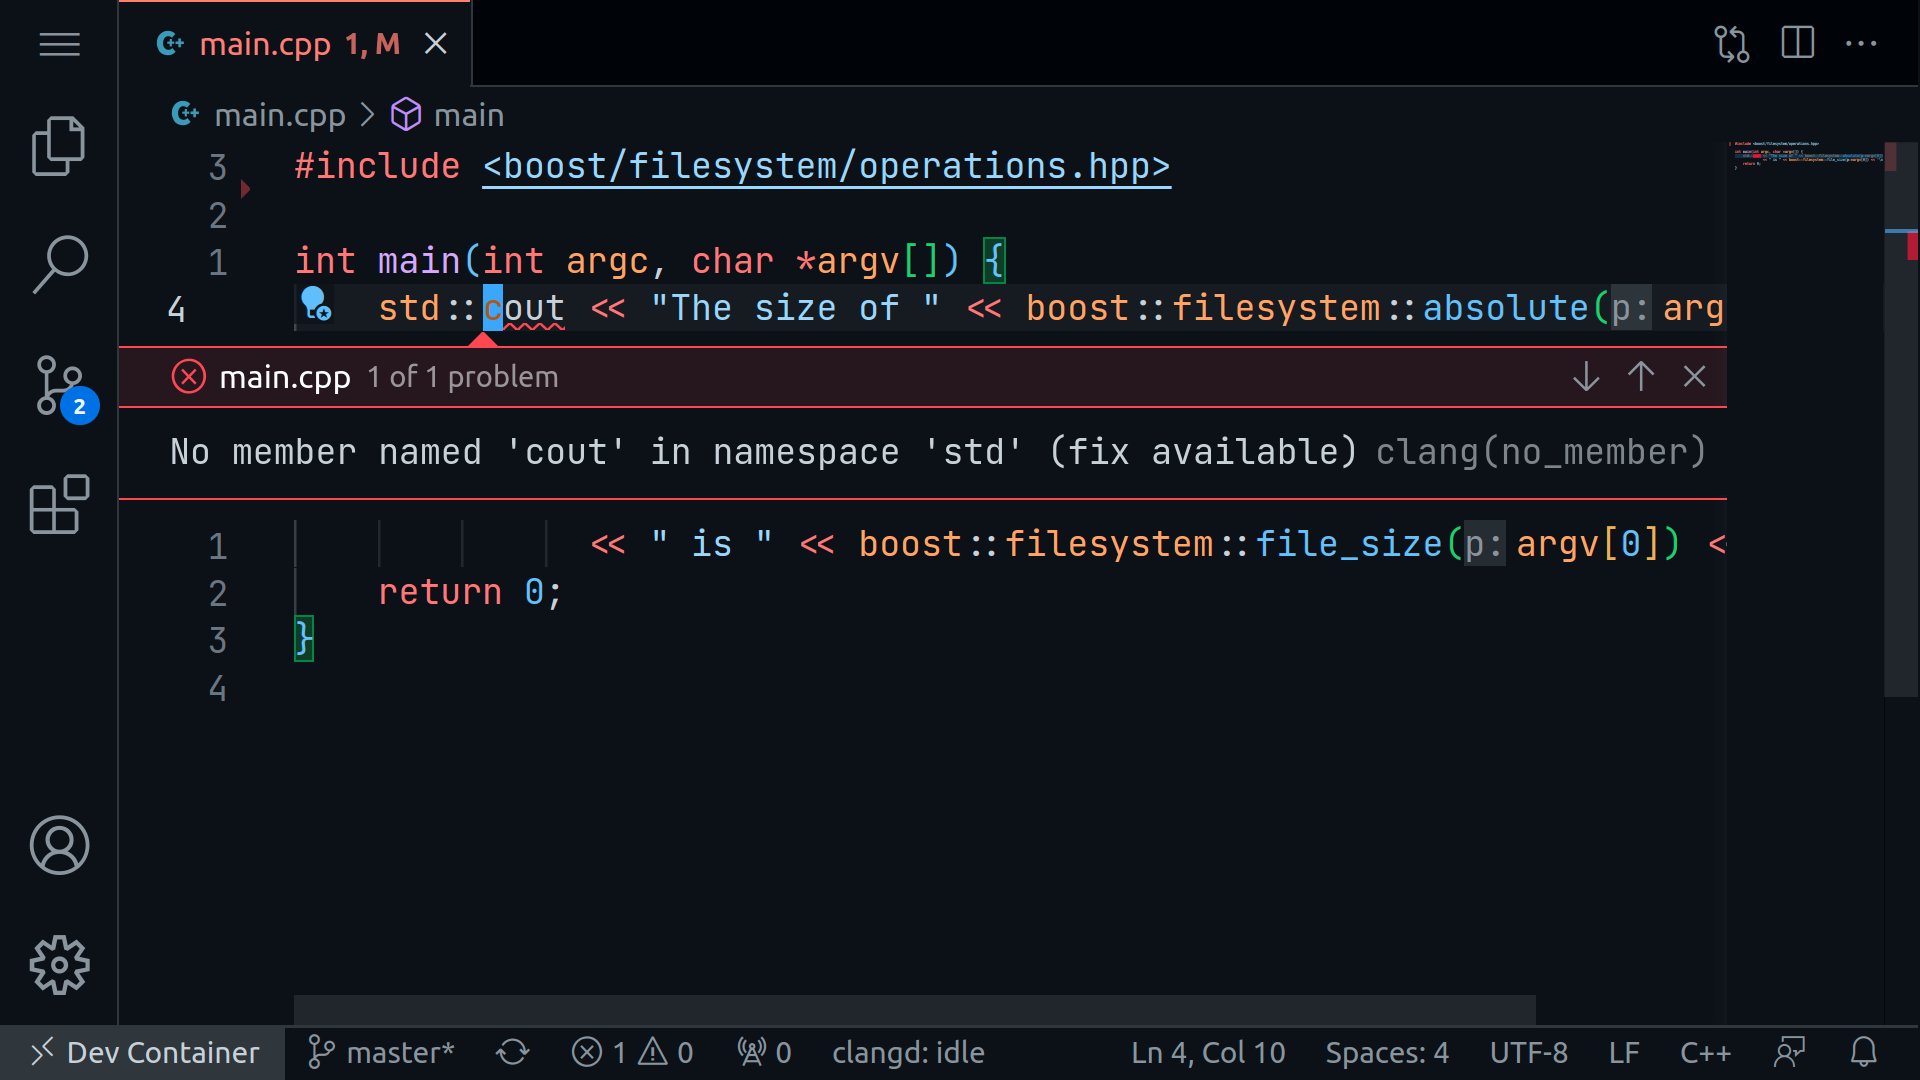
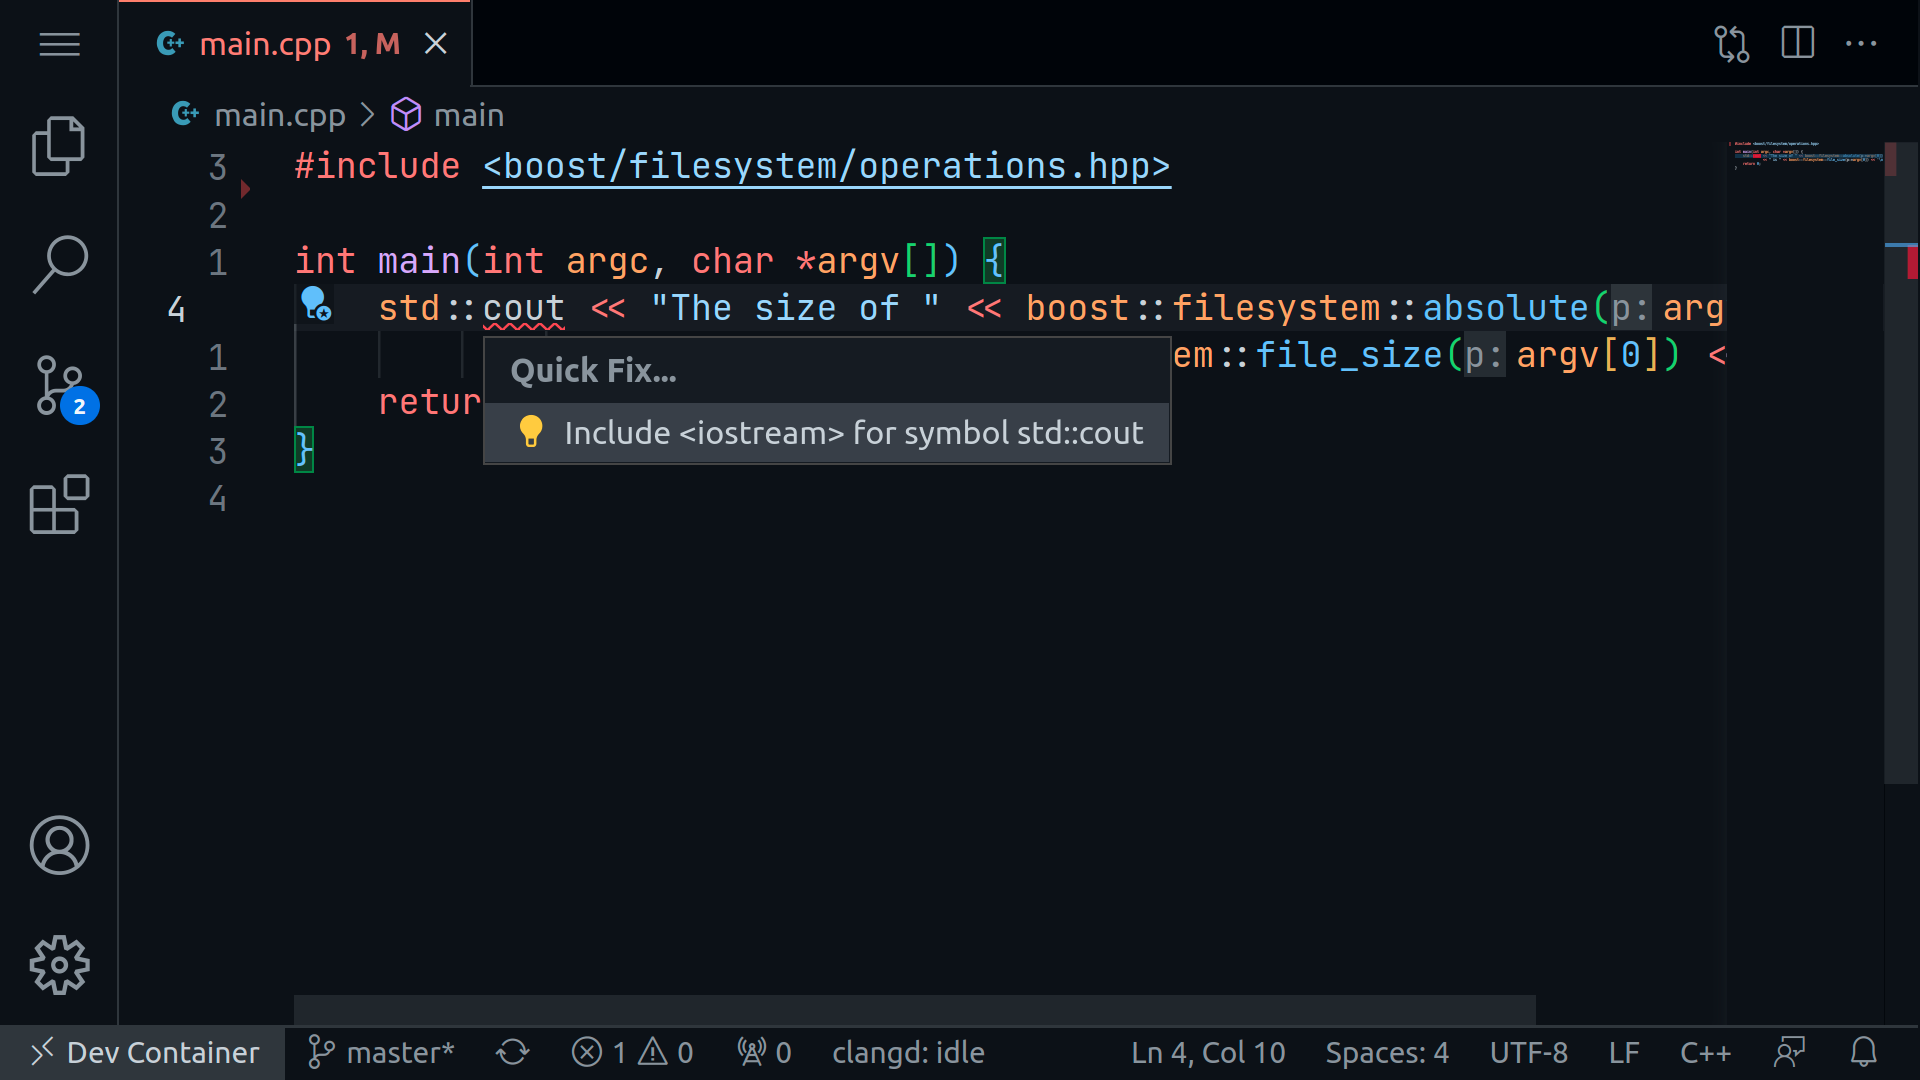
Additionally, clangd provides error and warning messages based on compiler diagnostics and clang-tidy configuration (if it exists):
It also provides fix suggestions for cases when the compiler can help:
The last noteworthy feature is the support of format based on the .clang-format file.
Further Improvements
After critical setup is completed, other valuable extensions can be added to the .devcontainer.json. It might be crucial because once launched in Docker, all the interaction with source code is done from within a container, i.e., if a user uses any plugins for editing file types other than C++ within their project, it is recommended to add the corresponding plugins to the .devcontainer.json file.
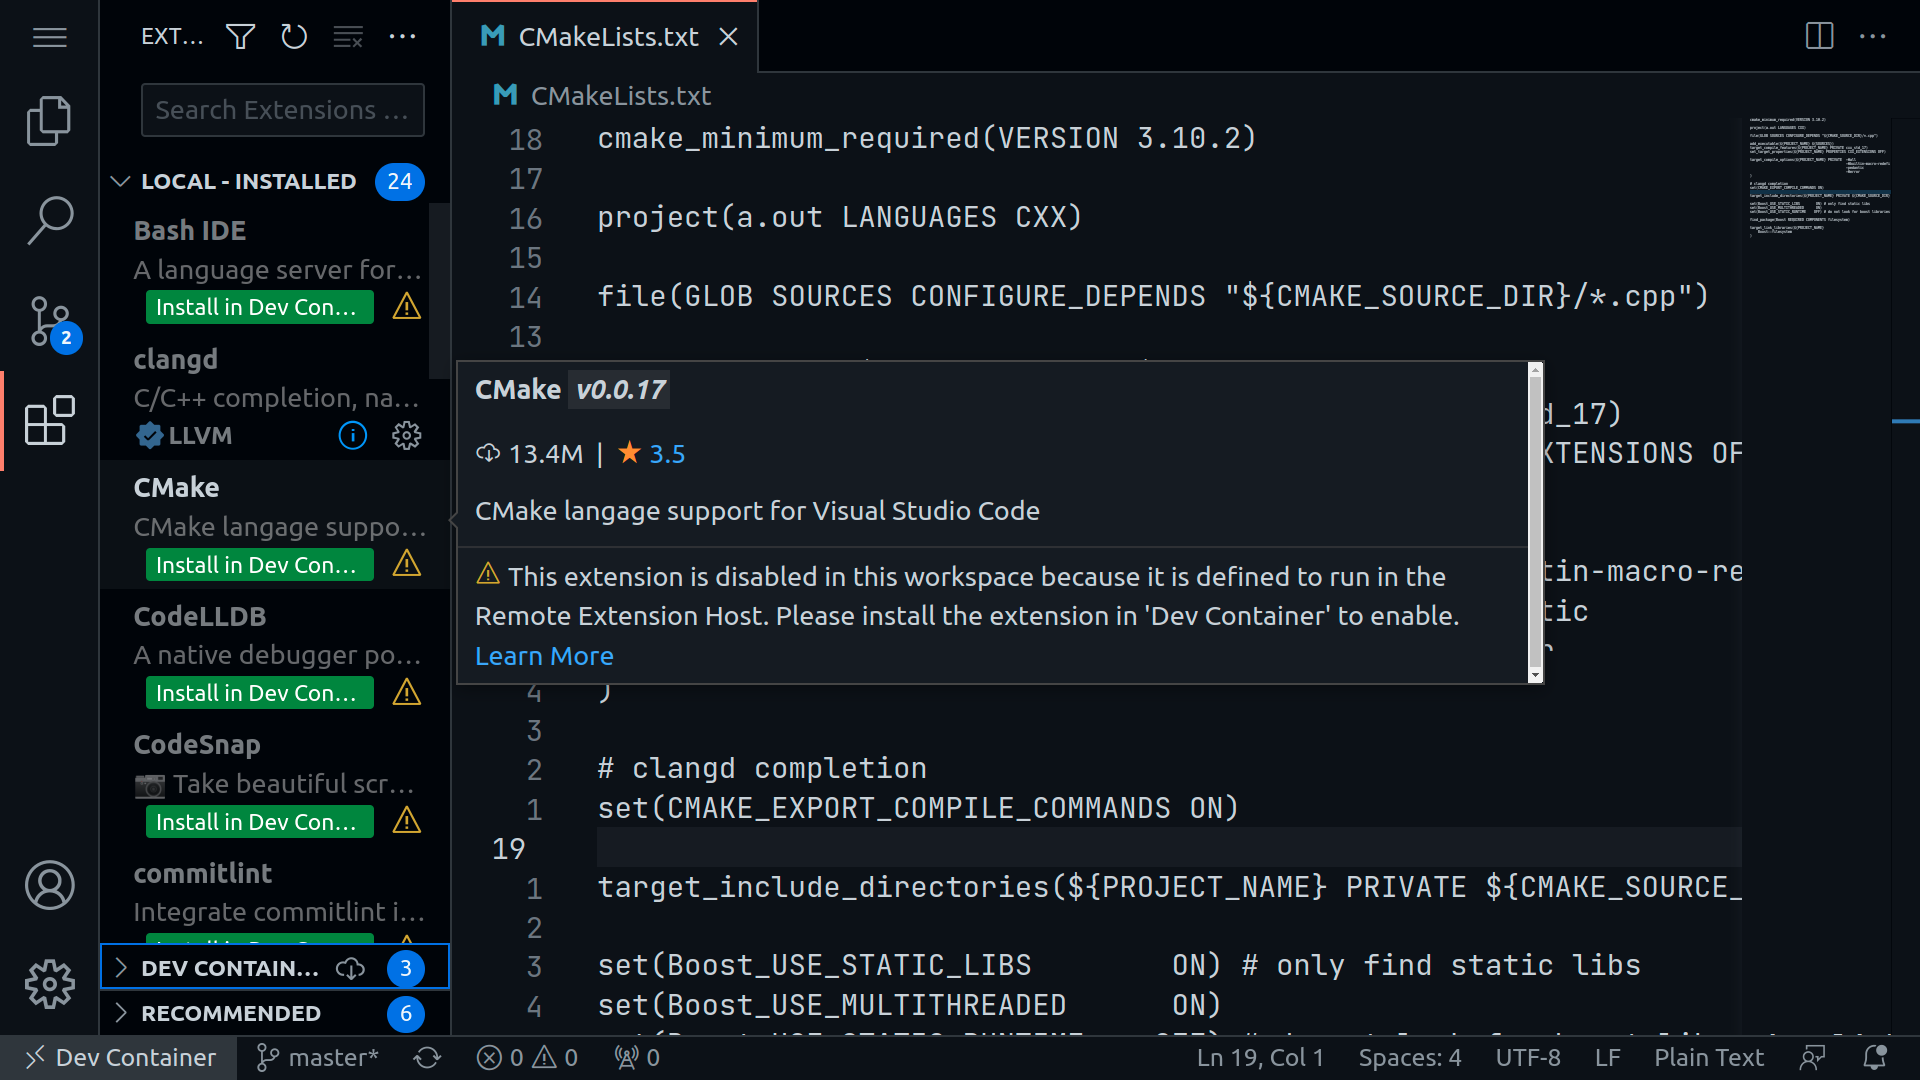
For example, CMake files are not highlighted properly; this is remedied by installing the CMake plugin in the container, as shown in the picture below:
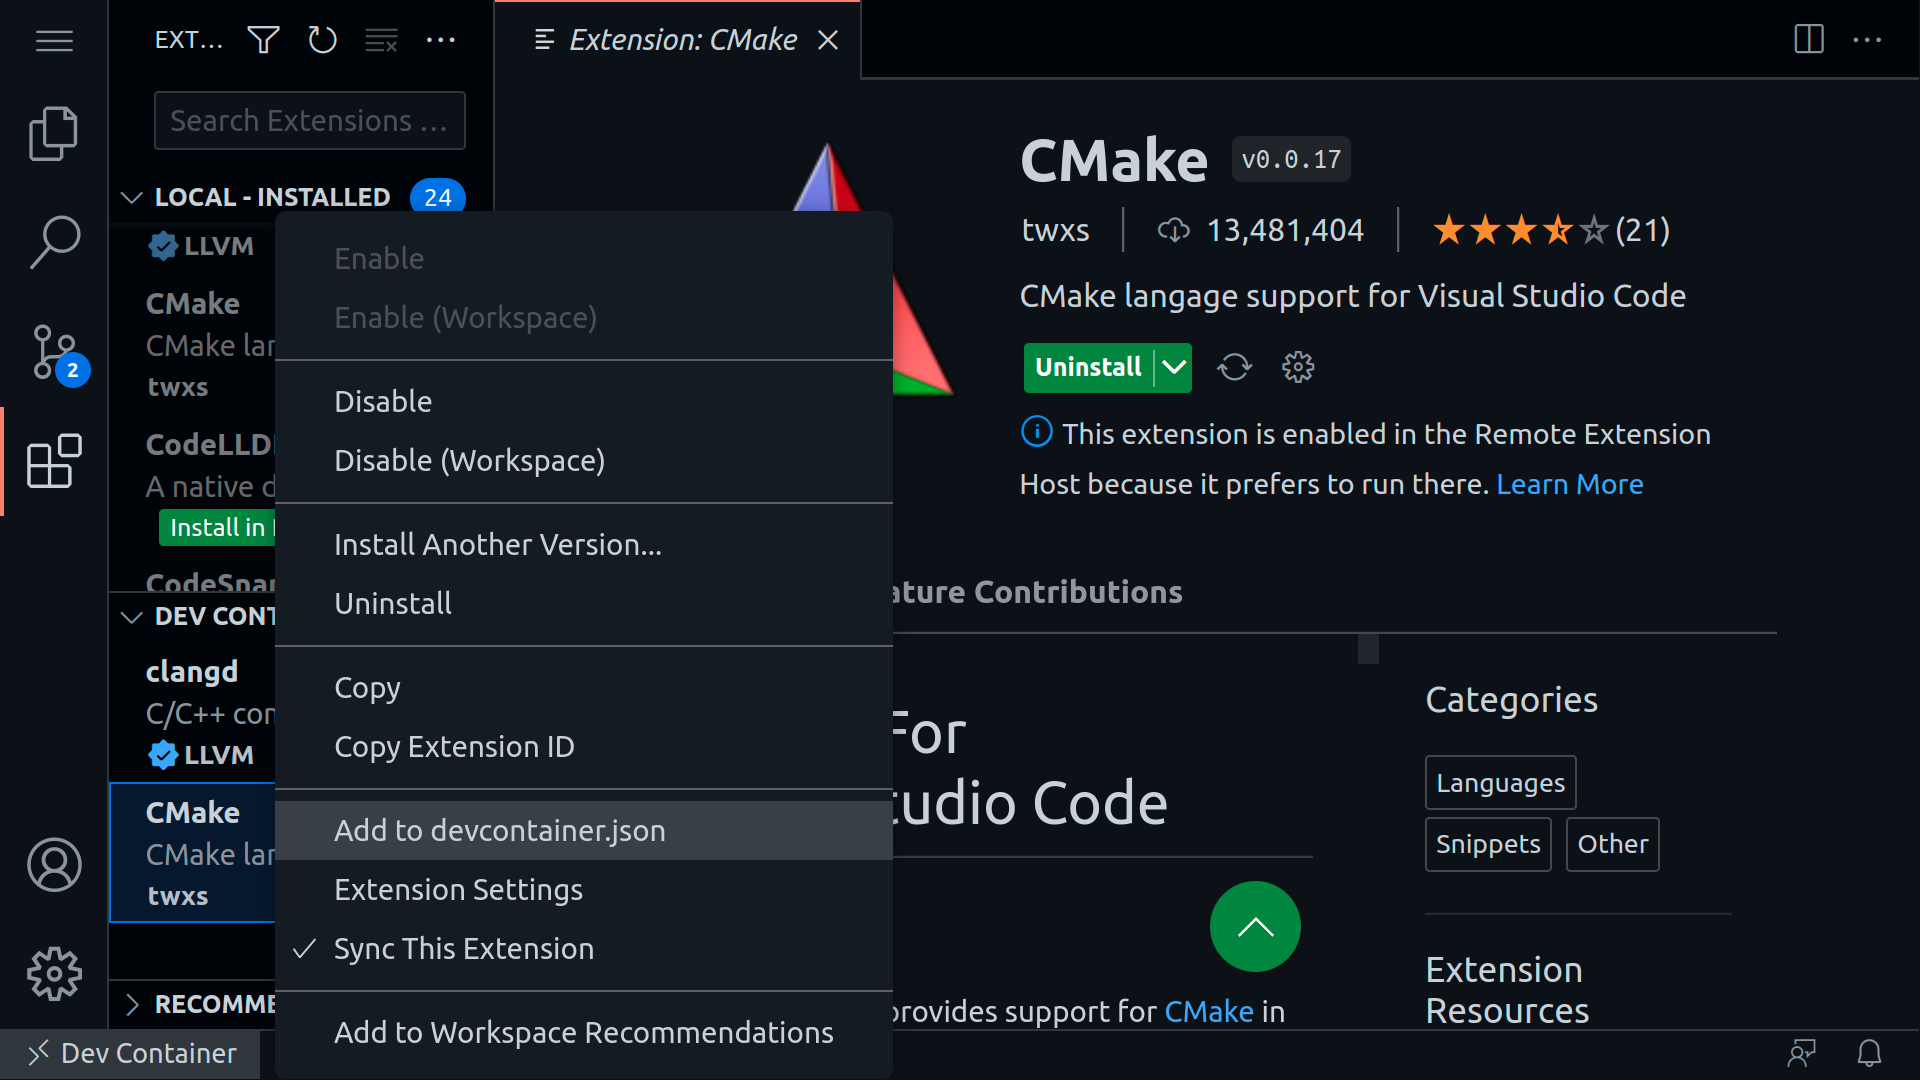
After the plugin is installed, I suggest adding it to the .devcontainer.json file either manually or via the UI so that the next time the container is launched, the extension will be installed automatically:
Besides those mentioned, my setup usually includes various plugins, depending on the project: Python plugin(s), Grammarly (checks grammar in text and markdown files), Git Lens, markdown linter, and others.
Some users might find the CodeLLDB extension useful, which provides a native debugger powered by LLDB to debug C++, Rust, and other compiled languages.
Update: How to share devcontainer.json in git repository
The approach when users add their favorite plugins to devcontainer.json file does not work well when the file is part of the repository: everyone adds their plugins, and Git marks the file as “dirty.” A possible solution is adding the file to .gitignore, but then every new developer setup needs a manual copy.
The preferred solution is to keep only essential plugins in the .devcontainer.json file while adding the personal plugins to “Default Extensions” in VS Code’s local settings:
- Open Settings
- Paste
dev.containers.defaultExtensionsto the Search field - Add
Extension IDto the list - Rebuild container
Thus, VS Code will install the default extensions in every devcontainer created by the user and keep the shared configuration clean.
Additional information
For complete information regarding the configurations available for the .devcontainer.json file, please refer to the official page.
As usual, the example project on Github is updated with the docker configuration described in this post.
Special thanks to Rina Volovich for editing.